READ this entire installation guide before beginning your installation. The manufacturer is not responsible and will not be held liable for project failures if installation guidelines are not followed.
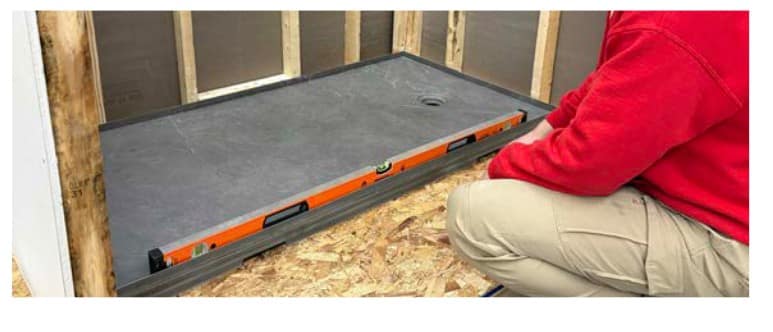
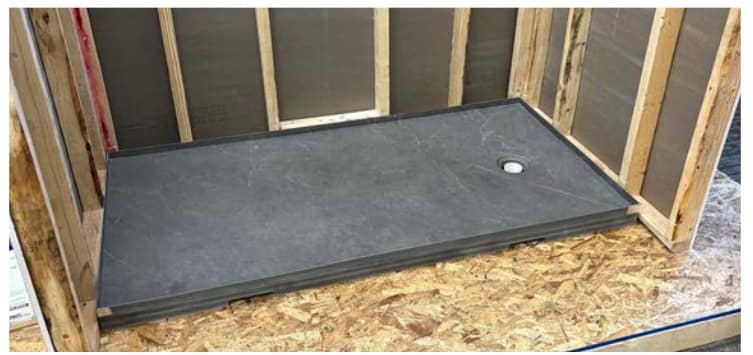
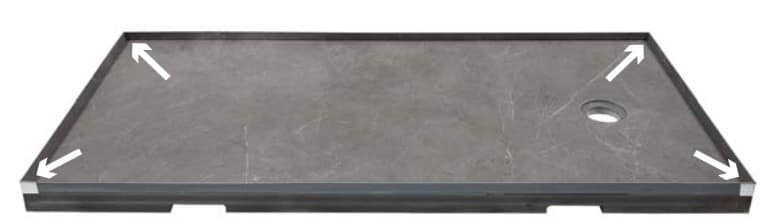
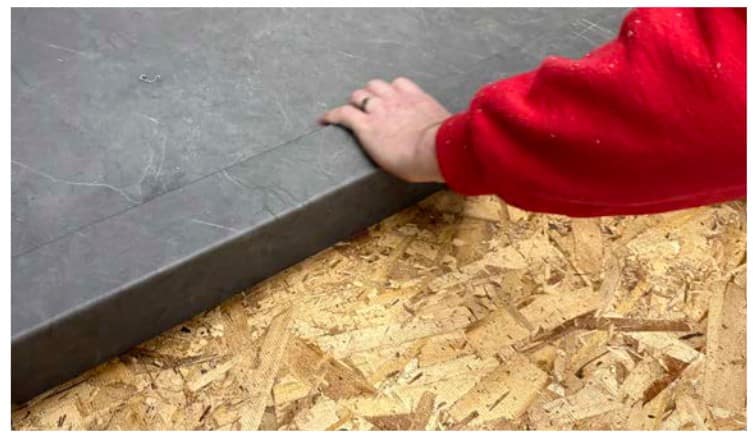
Be sure that the installation surface is flat, level and solid and will be able to support the total weight of the shower base. Also ensure that all framing around the base is square. Please note that irregular installation surface level or improper angle of side walls could result in serious problems for your installation.
If the sub floor is not flat and level, we recommend you put down a self-leveling mortar bed where the base will be positioned.
Please inspect packages for damaged or missing pieces. Read instructions carefully prior to installation. Please call Customer Service at 1-800-434-3750 Monday-Friday 8 a.m. to 5 p.m.
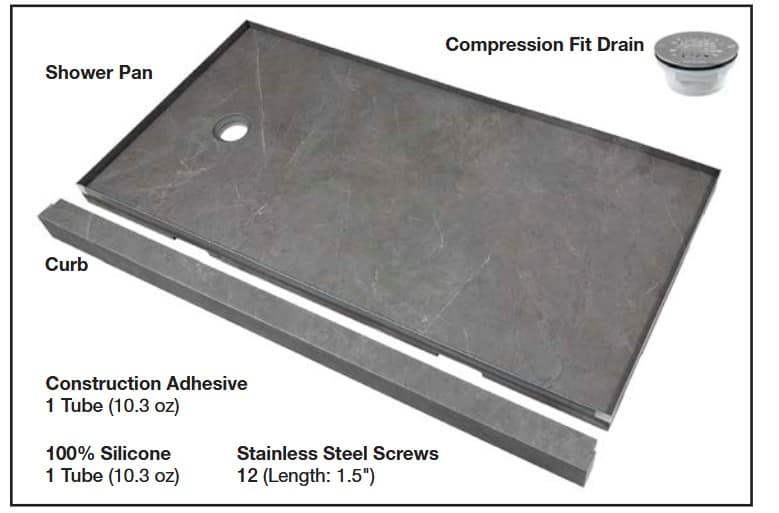
Tools and supplies needed:
- Protective eye wear
- Caulk gun
- Drill
- Tape measure
- Level
Installation:
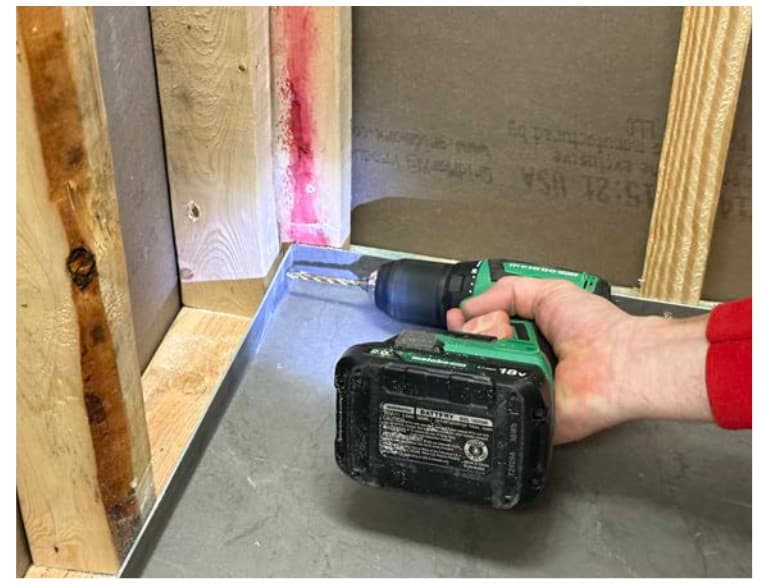
Before beginning the installation of the shower pan, make sure the sub floor and stud walls are square and plumb. Cut a 5″ x 5″ opening in the sub floor to allow room for the drain. Follow the assembly instructions provided with the shower drain and ensure that the 2″ drain waste pipe extends above the surface of the sub floor and the height of the shower base.
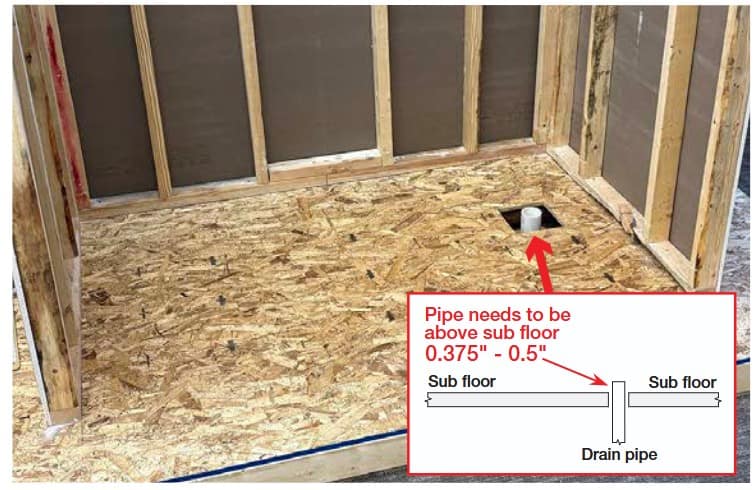
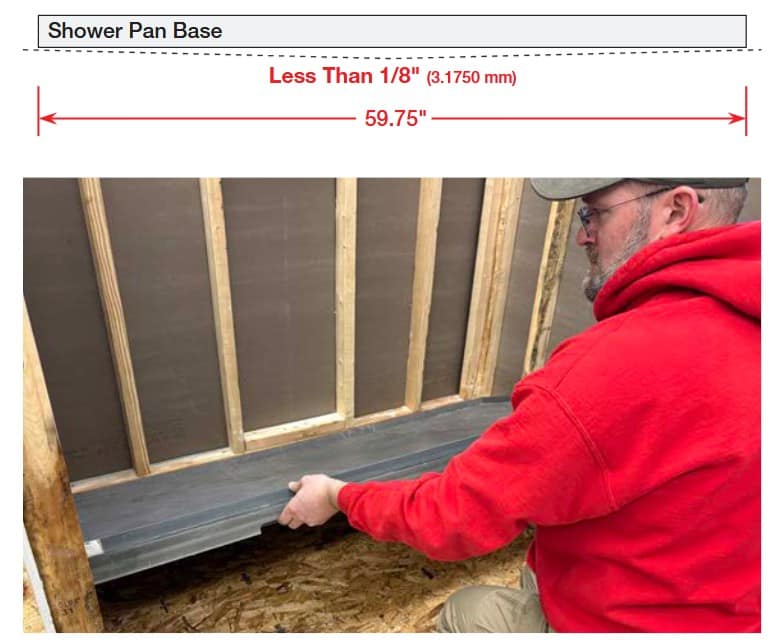
Ensure the sub floor is clear of debris and completely flat and level. The entire bottom of the base must be in contact with a flat, level surface. Sub floor should be less than 1/8″ of 6′ (see drawing below). The shower pan will not drain properly if the sub floor surface is not level.
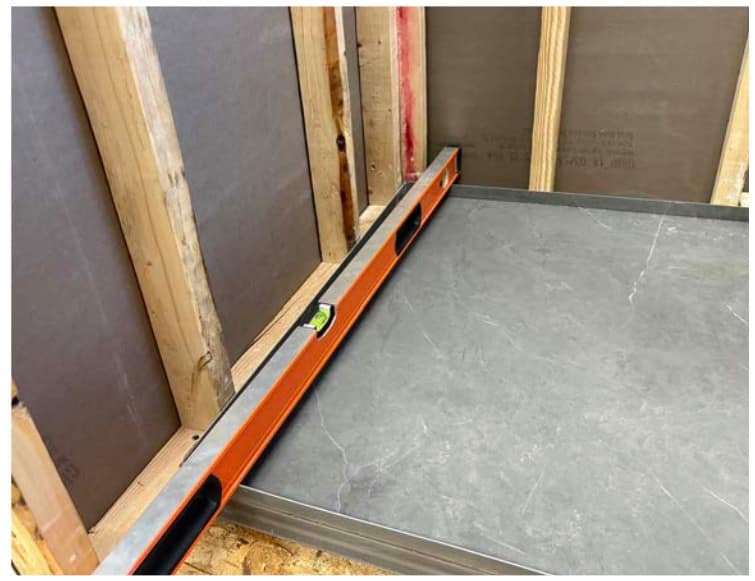
.
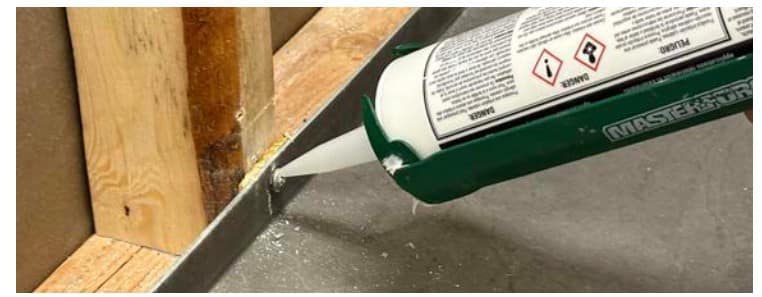
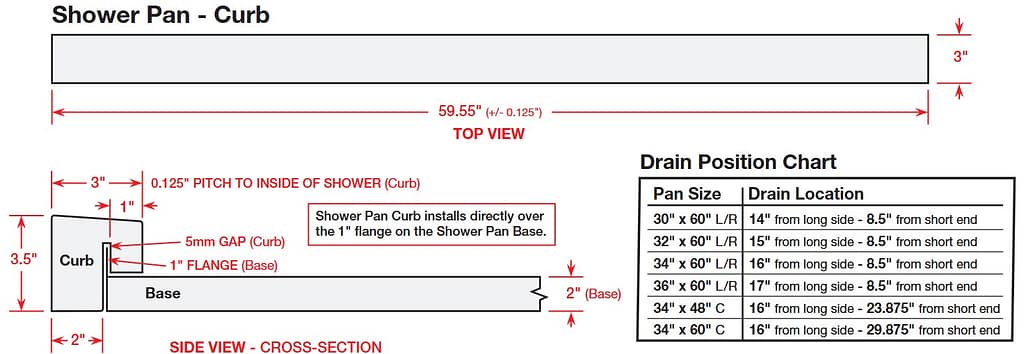
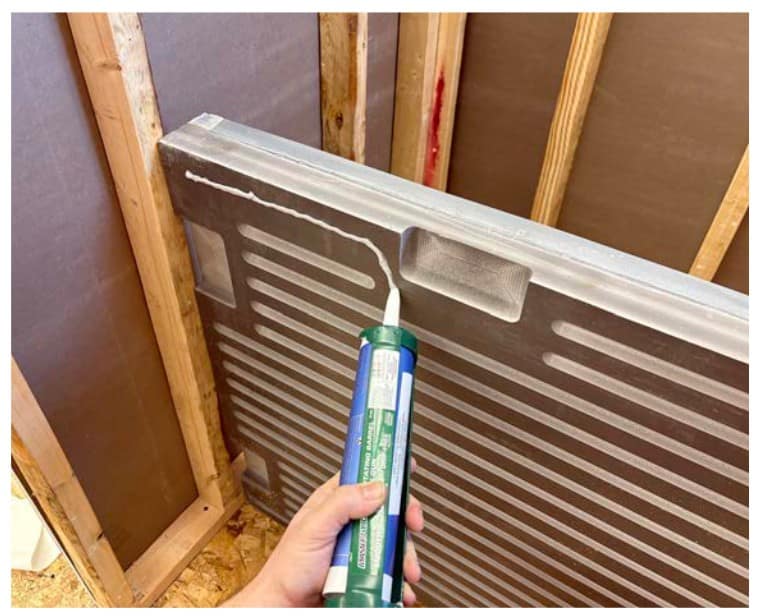
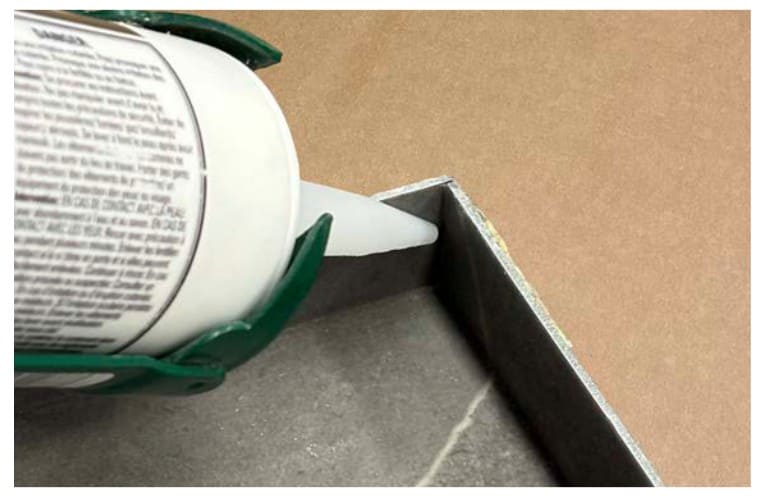
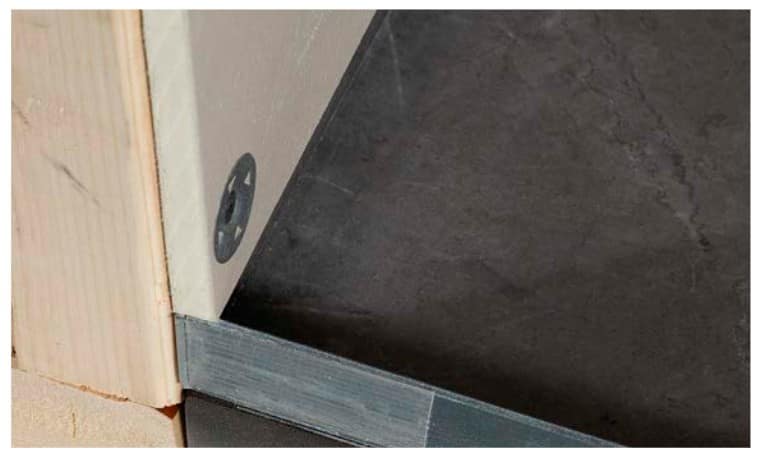
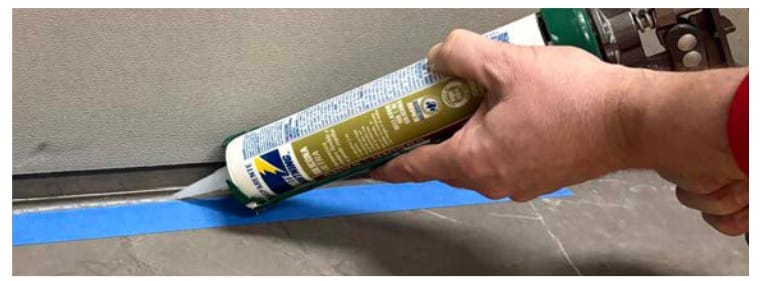
Apply 100% silicone along the vertical seams in each inside corner. See detail below.
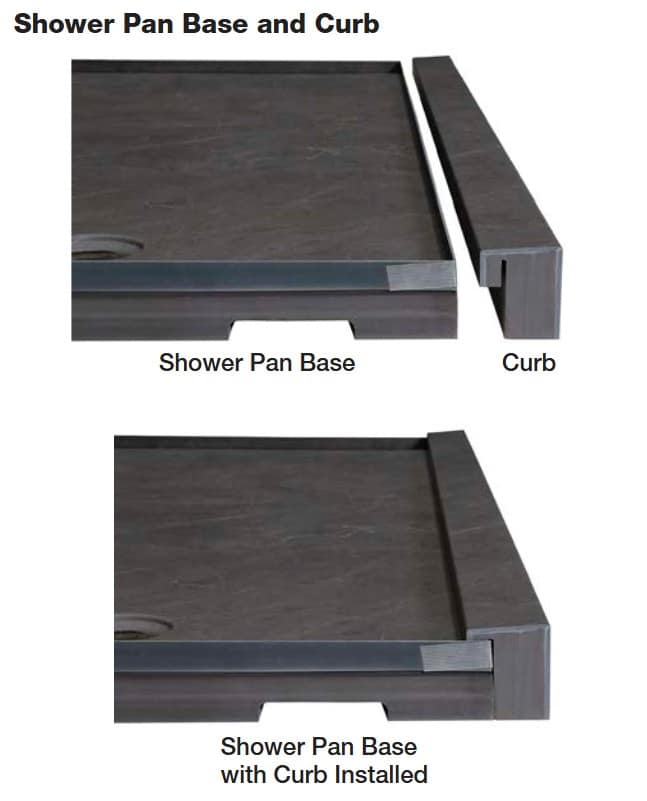
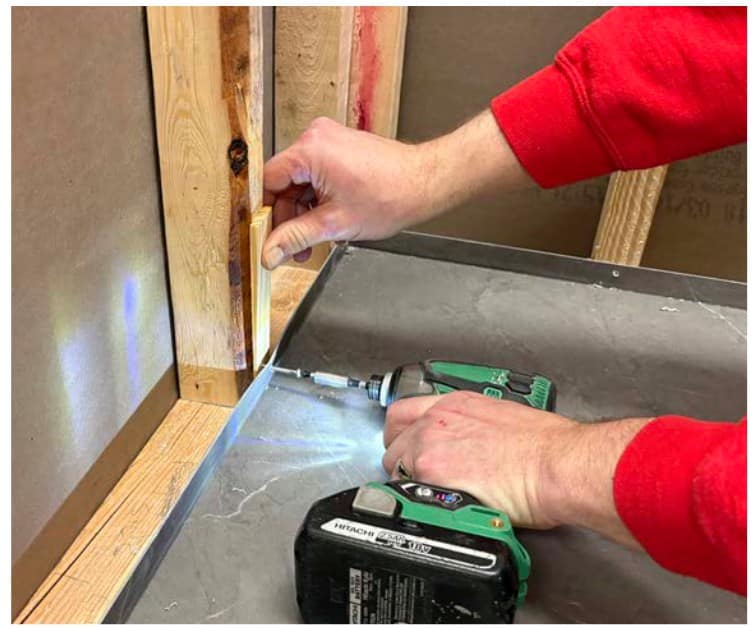
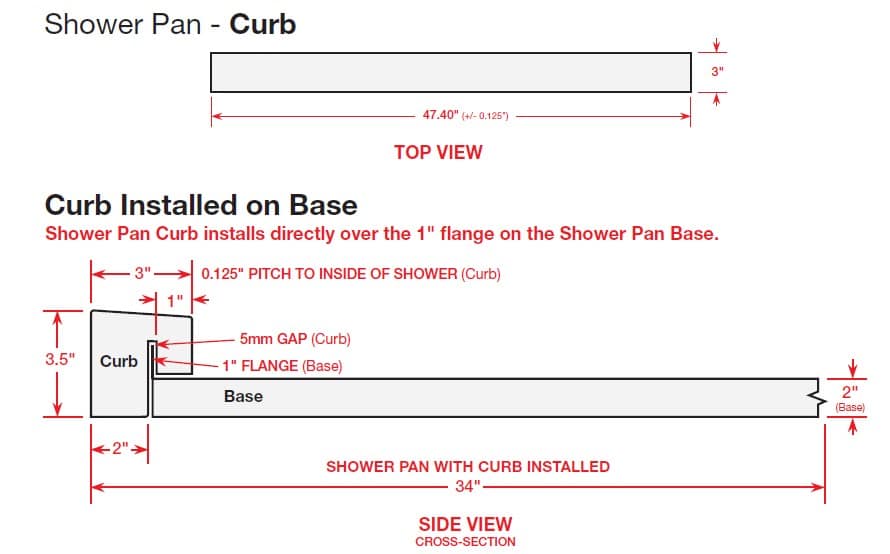
There are Multiple Options for Curb Installation
The option you choose is dependent on your wall installation approach.
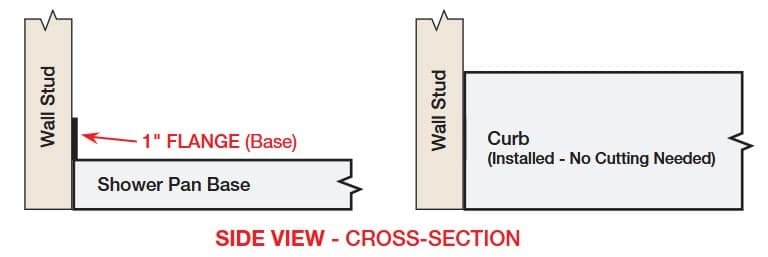
Option A – Installing curb after walls are finished
install water board and finished wall first. This is the preferred method when using PVC shower panels. The curb is installed as the last step. You will need to trim the curb for it to fit against the finished wall.
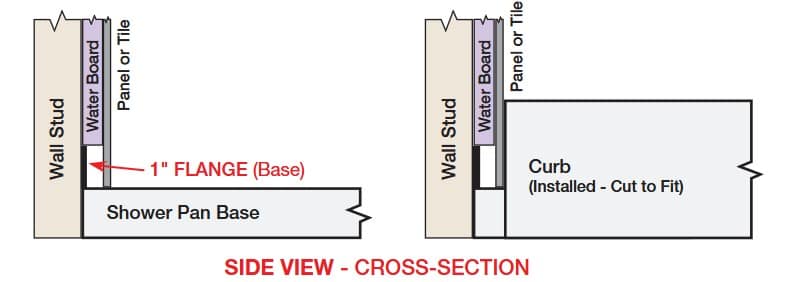
Option B – Installing curb after water board is installed
Install water board first, the trim the curb to fit against the water board. This also can be a good option for traditional tile or other products. Note, with this option you will need to trim the curb to fit tight against the water board. Your finished wall would then go around the curb.

Option C – installing curb before starting walls
Install curb first and build water board and finished wall around the curb. For this option, the curb will not need to be trimmed. This option may be preferable when using traditional glass or ceramic tiles.
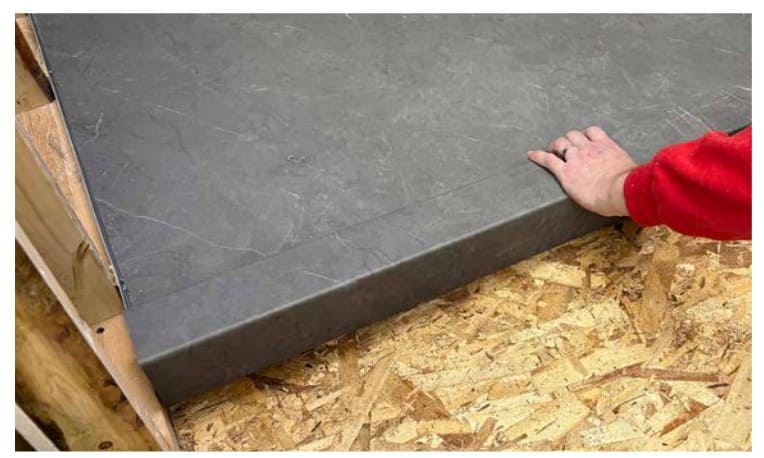
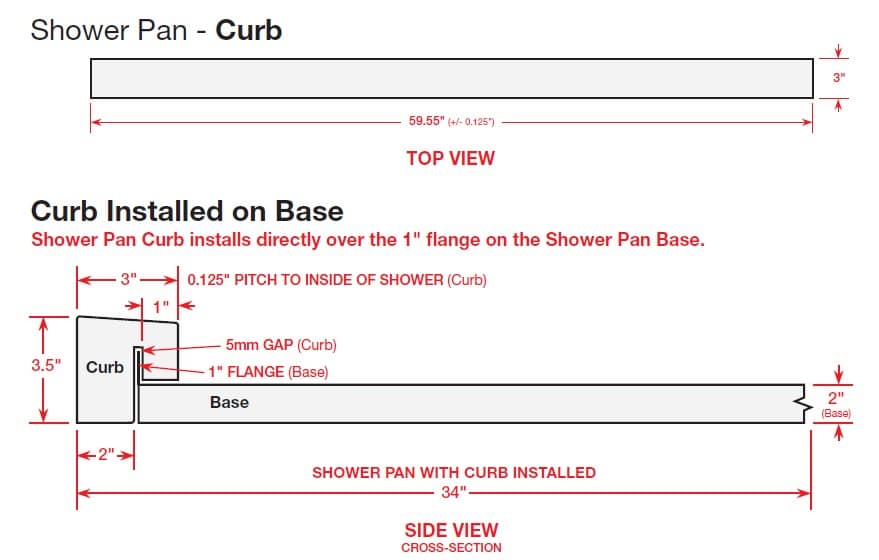
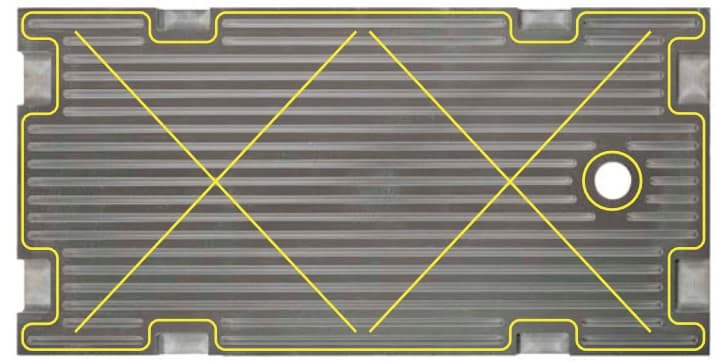
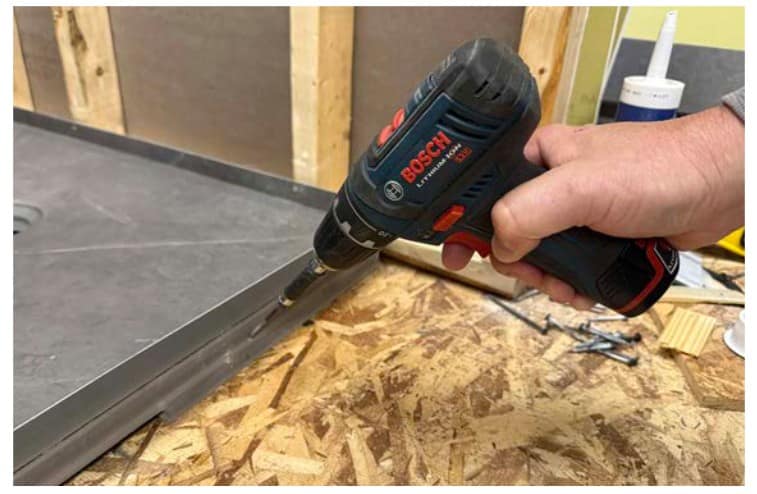
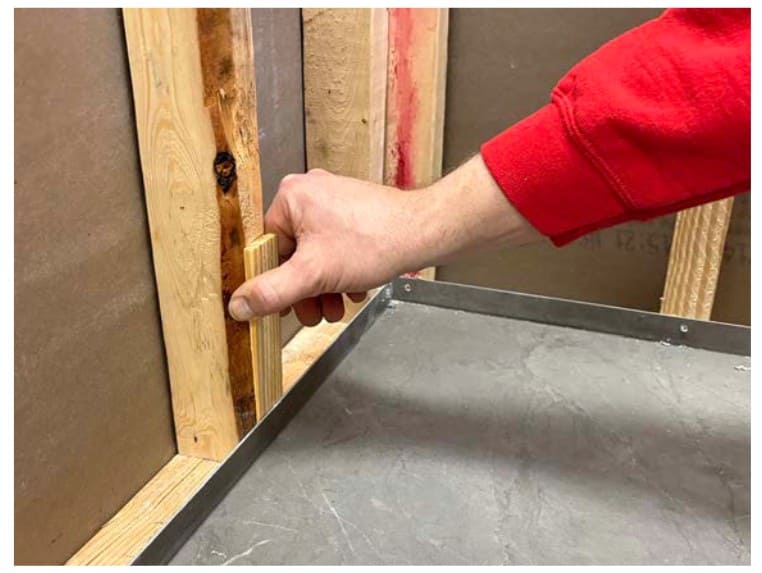
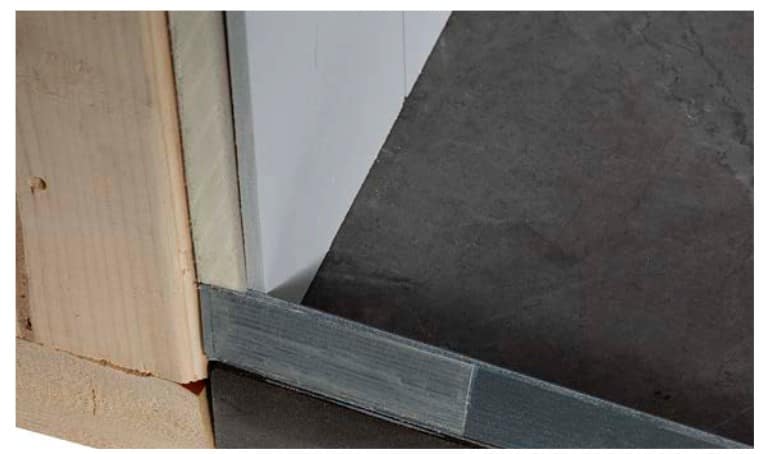
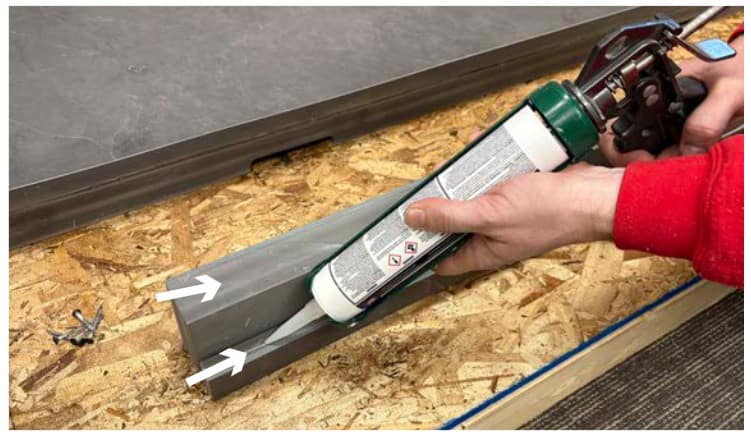
Adhesive Application to Curb
Trim the curb if needed to fit tight against both the left and right walls. Use a chop saw or table saw for trimming the curb.
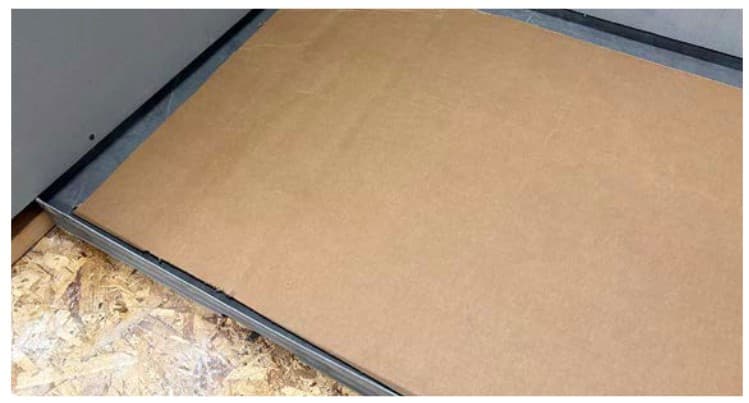
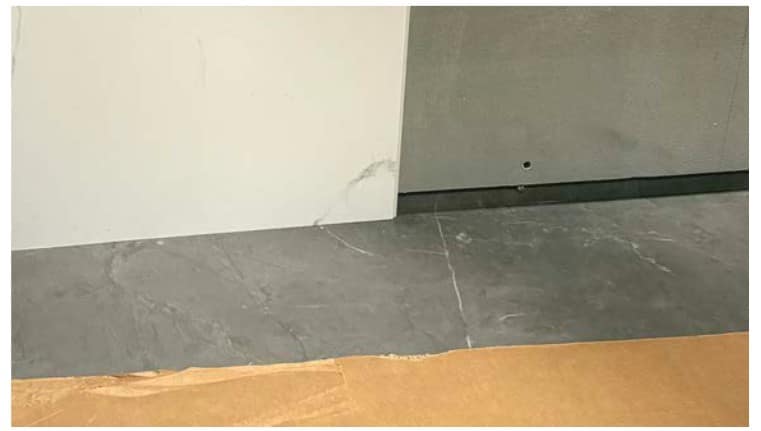
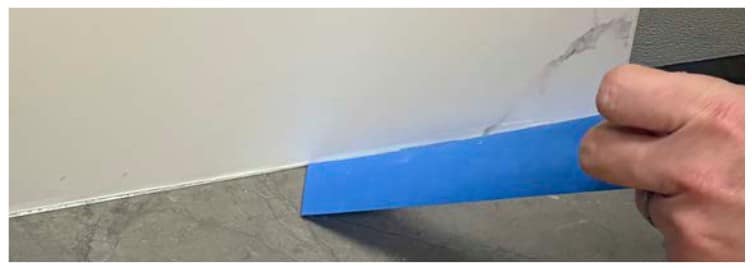
Sealing the Finished Wall During Install
There are many material options to finish your shower wall.

Drain Installation
Be sure to check all local plumbing codes before beginning any plumbing installation.
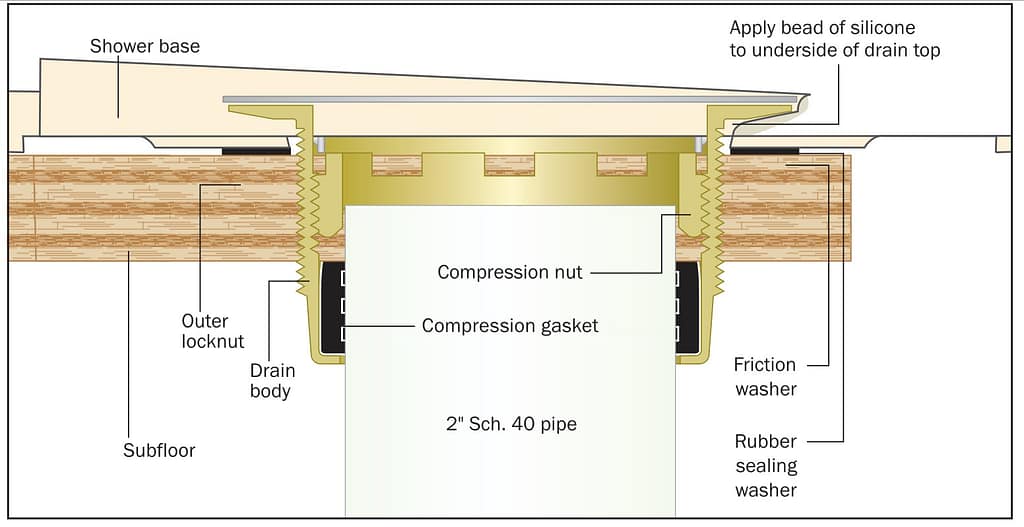
Disassemble drain completely. Unscrew and remove outer locknut, friction and sealing washers, remove strainer and internal wrench, unscrew compression nut and remove compression gasket from drain.
Before the shower base is set in the floor, attach the drain to the shower base. Apply a thick bead of 100% silicone sealant around the underside of the drain top flange. Install the drain body through the hole in the top-side of the shower base. Push and hold drain body against the shower module floor.
From the bottom side of the shower base, place the black rubber sealing washer, then friction washer, up over the threaded drain body. Be sure there are no obstructions and that the sealing washer makes clean, even contact with the bottom of the shower base. holding the drain body in place, engage the outer locknut and tighten up against the two washers.
NOTE: The poly friction washer is intended to protect the rubber washer from damage while the bottom portion is threaded on and tightened up.
Wipe away excess silicone that has squeezed out from the top-side of the shower base.
Measure and cut the drain pipe stub-up such that when the shower base and drain assembly is in place the top of the pipe is between 1/2″ and 3/4″ below the top of the drain body. Set the base and drain assembly in place according to the base manufacturer’s instructions. Position and lower the assembly over the drain pipe so that the pipe comes up through the drain body.
Once the base is lowered, adjust the pipe or base so that the pipe is centered within the drain body. Confirm the top of the pipe is between 1/2″ and 3/4 ” below the top of the drain body.
From the top side of the shower base, push the compression gasket over the pipe with the taper side up. Slide the gasket down over the pipe into the drain body until the bottom of the gasket sets against the bottom of the drain body. The top of the gasket should be flush with the top of the drain pipe, or slightly lower.
Place the compression nut over the pipe and, using the internal wrench, thread the compression nut into the drain body over the gasket. NOTE: Take care not to cross thread. Tighten the compression nut completely to form a tight seal between the gasket and the pipe. Carefully remove the wrench and keep it for any necessary re-tightening.
Allow 24 hours for silicone to cure. Then check for leaks. Turn water on in shower and from below shower floor (if accessible). check the drain area for leaks concentrating on 1) the area between pipe and compression gasket and 2) between shower base and sealing washer. If a leak occurs in area 1), use the internal wrench to tighten the compression nut. If a leak occurs in area 2), tighten the outer locknut.
When installation is complete, remove the adhesive cover from the strainer and install into drain.
Care and Cleaning
We recommend you clean your shower pan with mild detergents. Use a terry cloth towel, soft cloth or sponge. Avoid using abrasive scrubbing pads, steel wool or sponges. After cleaning, thoroughly rinse with water.
Avoid using abrasive or gritty cleaners which may damage the surface of the shower pan. Use of these agents will also void the warranty.
Shower Pan
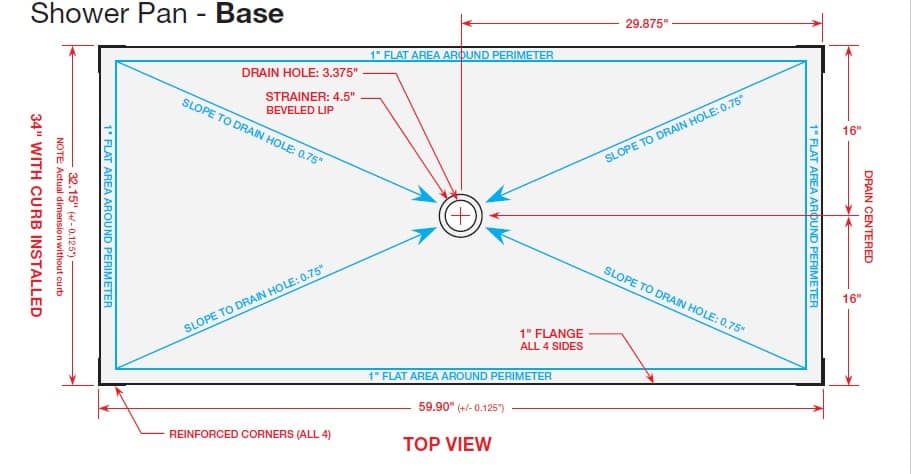
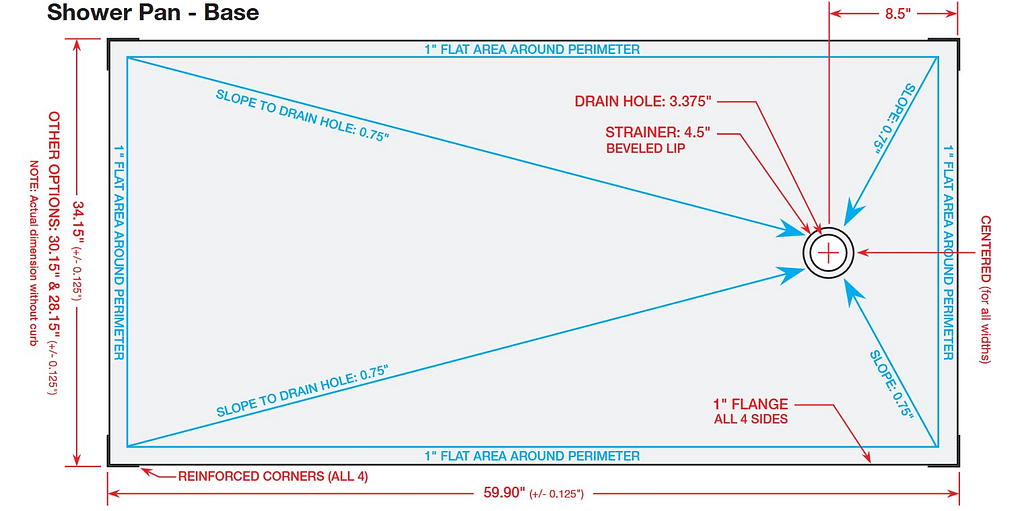
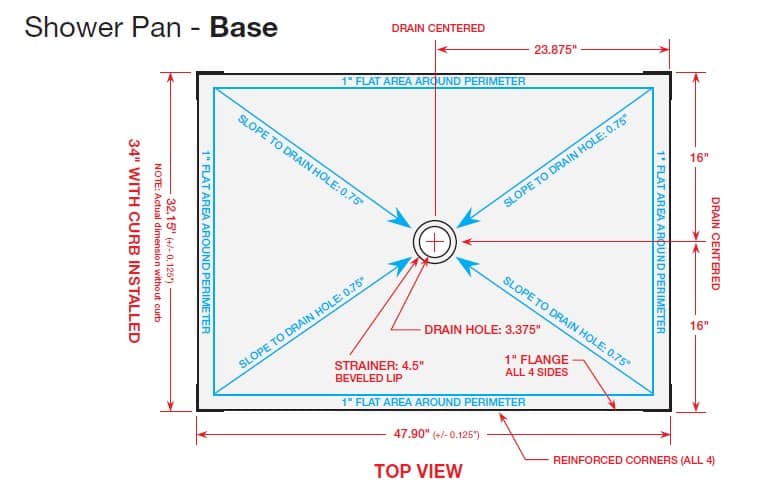
34″ x 48″ x 3.5″ – Drain: Centered
Shower Pan
34″ x 60″ x 3.5″ – Drain: Centered